Pages

  • About
  • The Edit
  • The Review
  • The Video
  • Contact/PR

my first Chanel lipstick...


Last week, I graduated from university, and my aunt handed me this.  We don't really do graduation presents in my family, but I suppose this falls into that category.

It's not like I shy away from high end makeup, but for whatever reason, I have never even entertained the idea of a Chanel lipstick.  It felt too grown up/classic/out of my league.  Having tried this though, I can visualize the beginnings of an haute lipstick binge.

This is a Rouge Allure lipstick in #28 Romantic.  On the bullet, it's a cool-toned berry colour with a very pink base.  The house's name is stamped on the side of the bullet, which twists out of a gold casing.  Funny enough, my aunt couldn't figure out how to open the lipstick.  There's a spring-loaded compartment that the bullet rests in, so you press on the gold bottom of the case, and an edge will pop out so you can remove the case.

The formula is extremely smooth but not too creamy -- right on par with all my department store lipsticks.  The colour payoff is excellent, too, almost opaque in one swipe and definitely opaque in two.  There's a tiny amount of reflection so the finish is pretty satin-y.  I personally prefer matte/cream finishes, but I can see a lot of people liking this.  In the swatch the colour is rather true, but on my pigmented lips, leans much redder.  It's a bright raspberry pink, which almost works on my skin.  

I'm not sure why, but I don't absolutely love this colour on me when I first apply it.  After blotting and powdering the brightness tones down a little, and it works better with my skin.  Isn't that weird?  I love NARS Schiap more than anything, but this just doesn't work.  Clearly I can't do anything in between; I need BRIGHT or muted.  To make this work, I'll apply a milky-peachy gloss on top -- something like Revlon Nude Lustre or Stila grapefruit works really well. 

This has been kind of a Chanel week.  What should my next item be?  Let's go three for three.

Chanel Diwali

I have been lusting this colour since last year's shows.  For a long time, there were so many photos that offered the tiniest glimpse of glowy, gold goodness on the models' tips, and from those I already knew I was in love.

Then one of these came out, and I was sold.


Yesterday, I caught a tweet that mentioned that the Bombay collection was up for sale, so I called my nearest Holt Renfrew and immediately put one on hold.  When I got back to my apartment, I didn't even bother to properly shape my nails or buff away my cuticles; I just needed to see how this metallic would translate.


The colour itself is a perfectly balanced combination of gold and silver, kind of what I imagine the Armani Eyes to Kill #19 to look like after you've used it a few times.  I find the best way to judge a colour is to see if it catches your eye at a glance and in different lighting.  For example, I knew I was in love with Chanel's Blue Satin when I was showering one day, and though you couldn't see the shimmer in my dim bathroom light, the navy still had an infinite amount of depth.  Also true with this one -- no one would think that a silvery gold would be unusual, but once again, Chanel has managed to create a deep "glow" about it that you can't describe until you've seen it in person.  If you've previously used another Chanel metallic, you'll understand.
Occasionally (especially for a hand-talker like me), it'll catch the light and give a pearly-white shine.


The formula is exactly like all other metallic Chanel polishes -- it can streak, but if you take your time with application, you won't have a problem.  If you also use their base coat and top coat, the finish will be even smoother.  The shimmer is extremely fine, almost as though the formula has no base colour, and they've packed metallic powder into a bottle.  In one thin coat you can still see a little of your nailbed, but it is completely opaque in two thin coats.  I have a feeling this would be a one coater if you could spread the polish evenly enough.


Base Coat: Butter London Nail Foundation
Polish: Chanel Diwali, two thin coats
Top Coat:  Butter London Hardwear
Diwali is available at all Chanel counters for $27 CAD.  It is also available at Holt Renfrew.

Interview Makeup

Over the past few weeks I've been heading to a series of interviews, and my look hasn't really changed from meeting to meeting.  It's an extremely basic, pared-down look, since I'm headed towards something a little more corporate/conservative.  My goal was to achieve a natural look, but with a little bit of effort -- this is one of those times that I think it's okay to look like you've put on a lip colour and that you've bothered to pluck your eye brows.  On the flipside, I don't want to look like I spend a lot of time on my look or have my makeup be the focus of the interview.  Can you imagine if all they remembered was how perfectly winged my liner was?

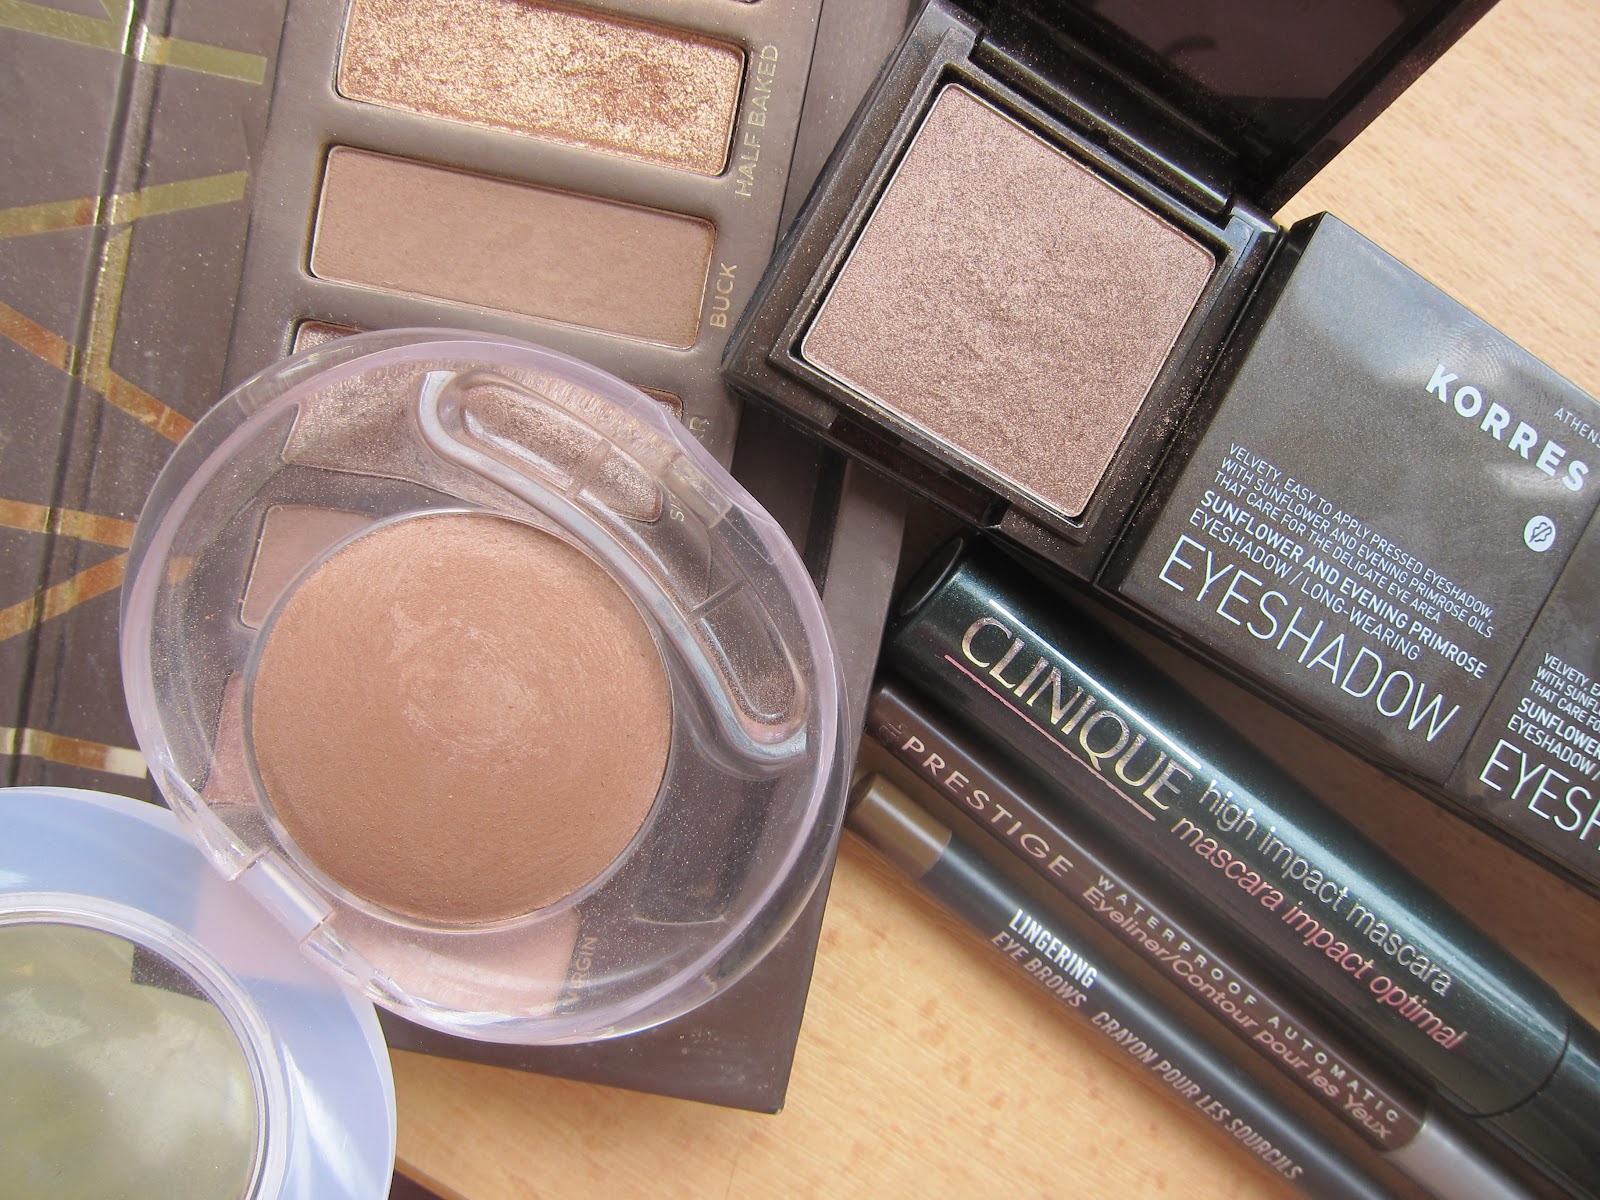
My look had to be clean, not too perfect, natural and easily touch up-able (that's officially a word on this blog).  My partners in crime...


Eyes:  I don't suggest anything too shimmery; it can look really harsh under fluorescent lighting.  Not to mention it can look semi-trashy if it's a cheap shimmer.  I also think this is the time to exercise a one-colour rule -- don't go for a look that requires four different colours, it'll just stress you out.  I did a simple wash of colour over the lid, but people with a crease would get the same kind of definition by placing the colour in their socket line.  Give your brows a quick brush, and fill them in just enough to look complete and natural.  As for eyeliner, I went for brown, even though my hair is so dark.  It looks much softer, almost like it's not there, and my mascara was dark enough to make me look like I still had lashes.

Clockwise, from bottom left:  Pupa Baked Eyeshadow in Warm, Urban Decay Buck, Korres Bronze Brown, Clinique High Impact in Black, Prestige Waterproof Automatic Eyeliner in Sepia, MAC Brow Pencil in Lingering

My Skincare: Moisturizers

There was a time that I never moisturized.  I was firmly in the school of "Well, if I have oily skin, my skin makes its own moisture, why should I pay good money to add to the oil when I could use that same money to purchase harsh, oil-free chemical exfoliants?"

Yes, I was that girl.

It wasn't until one of my friends who has the most beautiful skin in the world told me that she doesn't use cleanser, but she faithfully moisturizes with Nivea Soft that I got all moisturizer crazy.

(Funny enough, I thought it was an old family secret or something, but no, she just liked the commercial.  She was that girl.)

Since then, I've branched out and tried a few more things.  Moisturizer is one of those things I'm still really fickle about -- I'm wildly curious about all the different ones that exist, but simultaneously terrified that each new one I try will wreak havoc on my skin.  It's moisturizer limbo.

From left to right in the photo above, I have arranged the bottles from most moisturizing to most mattifying.

1. Jojoba Oil -- This essential oil acts most like our skin's sebum, so I was the most comfortable trying this as an all-over moisturizer.  I can't use too much or I break out, but I tend to apply a few drops all over and soak up the excess with a tissue.  Otherwise, I mix it into one of the other moisturizers if I'm looking for a natural kick.

2. La Roche Posay Substiane Yeux -- Technically, this isn't a moisturizer, but I still use it when my skin is in serious need of deep hydration.  I tend to use it at night like a mask and apply it in a thick layer without rubbing it in.  Then I wake up with the ultra-hydrated, glowy skin and I'm happy for the entire day.  I don't use this regularly, only when I feel like my skin is in need of a mild treatment.  Maybe this shouldn't have gone under moisturizer...

3. Embryolisse Lait-Creme ConcentrĂ© -- this is every makeup artist's holy grail moisturizer and I totally get it.  It's light but super-duper hydrating.  I've found these past few weeks that it's been a little much for me, so I no longer use it during the day.  You can also use it to remove makeup or as a hydrating mask, but I haven't tried it for either of those things since I have other products that I like for both those functions.

4. Aveeno Positively Radiant SPF 15 -- I like the finish this moisturizer gives, and it doesn't leave my skin too dewy-looking.  I usually follow up with an actual sunscreen, but I use this on days that I'm in a hurry and/or am being lazy.

5. NeoStrata Oil-Free Moisture Infusion Lotion -- I'd never tried anything from the Neostrata line before this product; to be quite honest, I'd barely heard of it.  A boy in my local Shoppers Drug Mart convinced me to buy it when I was spending my points and I'm so, so, so glad he did.  I don't often go for oil-free things, but this is a godsend when I choose to put makeup on.  It has such a lovely, smooth finish that I don't feel the need to use primer when I've used this lotion.  I've used this at night and haven't woken up with excess oil on my face.

6.  Ole Henriksen Sheer Transformation Moisturizer -- I got this as a 100-point perk from Sephora. I think this dries even more matte than the Neostrata and also seems to have a slight airbrushing quality to it.  I'm not sure exactly what it is, but this is the moisturizer I use on hot days when I don't want to wear makeup.  This is also one of those magical oil-free moisturizers that doesn't leave my skin madly overproducing oil, but that may be because I don't use it every day.

Rest assured, I've purchased a handful more moisturizers on my trip which I'm so ready to test out! I'm contemplating a Germany haul but...how many hauls would that already be this year??

Review: Tarte Lipsurgence matte lip tint

Envy, Exposed, Lively, Fiery

The name's a bit of a mouthful, but don't let that stop you from inquiring!

I picked up my first one of these around Christmas, and the other three recently joined my collection.  If you can see, Lively is weirdly proportioned.  Its cap is also different -- I'm not sure what happened there.


Fiery, Lively, Envy, Exposed

Fiery: Red.  Just red.  Not tomato, not brick, not vermillion, not blood-red, not blue-red, not fire-engine-red.  Pure red and only red.  I'm wearing it in my foundation roundup and a recent haul.

Lively: Bright fuschia that's not too blue-based.  And it doesn't oxidize red like NARS Schiap does.  This was the first one I purchased.  Looks GREAT with a brown smokey eye.

Envy: Is it brown?  Is it berry?  Is it plum?  All three, depending how much you put on.  First layer:  It's a coloured-in version of my lip colour.  Second layer I get a berry stain.  Third layer and I've got that 2012 SS runway lip. This is a dark that I think would work on anyone because it's so perfectly neutral.

Exposed:  A mauvey-nude, leans a little cool but settles into something suitable for warm skintones.  Reminiscent of Revlon's Mauve it Over but much less blue.

I have no idea why I didn't keep these in order as I was shooting

Texture: Colour-wise, it's beautifully matte.  Product wise, it feels like you have nothing on.  However, these can emphasize dryness or encourage any existing flaking, so make sure your lips are smooth beforehand.  There's a slight mint flavour upon application, but disappears fairly quickly -- I think it's supposed to be part of the plumping action?  I can't tell because my lips are already huge.  I think the plumping action has more to do with the colour you choose rather than the formula itself.

Wear Time:  Not amazing.  Contrary to the product claim, this doesn't so much act as a stain as a fantastically-textured lipstick.  If you're looking for something with insanely wear longtime, you're better off with something more liquidy like those new Maybelline 24-Hour liquid lipsticks or a high-pigment lipstick patted on. This has slightly better wear time if you push it into your lips in really thin layers.

Price: $31 CAD for 0.1 oz, so it's pretty pricey. It's slightly more reasonable in the States.


Indirect sunlight

Flash

Like the Tarte blushes, this colour range is fantastically edited.  I mentioned in this post how much I love a brand that edits itself well, and Tarte has done an amazing job of it.  There are also two more ranges of lipsurgence, one that's  glossy and one that's less tinted, but for such a pricey product, I'd get the matte version just because you can add gloss and sheer out colour if you like.  In terms of colour and texture, these are hands-down HG.  The staying power could be a little better, but otherwise these are well worth the money.

Review: GLEAM by Melanie Mills


Happy Monday, lovelies!  So a while ago, I received a couple of products from Melanie Mills, former head makeup artist of Dancing with the Stars!


These glosses are super-hydrating with a high-gloss finish.  The wear a little sticky (which you all know I LOVE), and they are fully opaque.  They leave behind the most amazing stain, so I like to apply Uncontrollable and Up Against the Wall straight from the applicator, then blend out with my fingers.  I apply Naked with the applicator and try not to blot because I adore a glossy nude lip. These are also scented; the fragrance is reminiscent of MAC lipglasses.


Uncontrollable: It's a bright, blue-based fuschia -- it leans a little mauve.  I can see this being a little cool for some very warm-skinned people, but this colour is right up my alley.
Up Against the Wall: Blood-red with just enough blue and brown to suit everyone.  I can 
Naked: This is a corally, brown-based nude.  I usually have a hard time finding nude colours that work on me (i.e., don't make me look dead or my teeth look yellow), and this one fits the bill perfectly.


Here's my thing about this line of lipgloss: this is a perfectly edited collection, which is extremely rare.  Another line that I find to be similarly well edited are the Tarte Amazonian Clay Blushes.  I kind of sort of really really love that there's one red, one coral, one fuschia, one raspberry and one nude and one of everything else.  There's certainly a side to me that loves that MAC and Inglot do 12 slightly different shades of taupe, but consumers just get overwhelmed if you give them too many choices. Kudos to Melanie for her forethought.


She also sent me her signature product: Body Radiance!  These bring the nicest sheen to the body, as evidenced by the DWTS clips I YouTubed.  I've tried to DIY this myself before, by adding shimmer powder into a body lotion, but that always ends up a) looking patchy or b) all over my clothes.  These shimmers are waterproof and transfer-proof.  In other words, a godsend.


I received two colours out of four -- Light Gold (left) and Rose Gold (right).  I thought Light Gold would be nicer on my olive skin, but I actually think Rose Gold looks much more natural.  These feel amazing and would make a great body lotion on their own.  I'm hoarding mine for an evening beach party so I can look all candle-lit and glowy!  If you grab one of the darker colours, it's the easiest way to fake a tan for a day.


All these products can be purchased directly from her site.  Lip Radiances retail $24 USD for 0.176 fl oz and Body Radiances range from $15 to $40, depending on the size.  Melanie's also got a book coming out, and it's rumoured to be the next Making Faces!  Can't wait, and I'll let you know if I hear anything about it!

Haul: Estee Lauder/MAC Warehouse Sale

Last weekend, Tod and I went to the Estee Lauder warehouse sale in Markham.  A few things...

  1. Accessibility: It's in the middle of surrounded-by-farmland nowhere.
  2. Prices: Some things were amazingly discounted.  Others, not so much.  Also, $/unit was a little wonky and I'll get into that in the haircare section.
  3. Inventory: They don't have everything.  They have a bunch of past collections, so this would be the chance to pick up limited edition item you may have missed out on.  There are also a ton of pro products which are hard to come by if you don't live near a pro store.  They have some normal store items, but not too many.  Skincare was curiously absent.  There was some, but unless you're seriously into Origins or the Clinique Poreless line, there wasn't much. There were also lots of DKNY, Tommy Hilfiger and Estee Lauder fragrances.
  4. Insane shopper syndrome: When you first get in, you'll feel this irrepressible urge to charge tables and purchase.  Try not to.  Go in with a plan/idea of what you want.
  5. How it works:  There are tables with a sample of each product that they carry and a number that identifies it.  You write down the numbers of things that you want and bring them to the stock people.  Kind of like a 1930s grocery store.  At each table they put your purchases into a bag and seal it for you -- you can't purchase anything that's not been bagged.  If you want to return one of the items ib your bag, you need to go to the returns table and have them repackage everything, but that doesn't take long.  It's easiest to get everything you might want and take a few minutes at the end to prune the excess and return it all at once.
  6. Was it worth it?  Yes. 
  7. Colours: Not all shades are available in foundations/powders/concealers.  I also recommend that you get yourself matched before you go to the sale.

I think the way to do this is to identify what you're missing from your collection, or what you've been lemming for a really long time.  For example, I know that I'm severely lacking in MAC brushes, and I figured this would be a great opportunity to get some.  I also wanted to pick up some Lustre drops, try Bobbi Brown concealer, and possibly pick up a Skinfinish Natural, because I've never tried one before.

Very few things on my extensive list were actually available, but it helped me kind of stay within the category.  Of course I still strayed from the list, but I can only imagine what I would have done with less mental preparation.  Another thing about having a  list of things you want is that you can scan the tables for those items and get them first.  This also makes the shopping process go a lot faster -- I got through all three rooms in 45 minutes.  Tod took a little longer and that's when I found myself finding picking up things I didn't necessarily want/need.

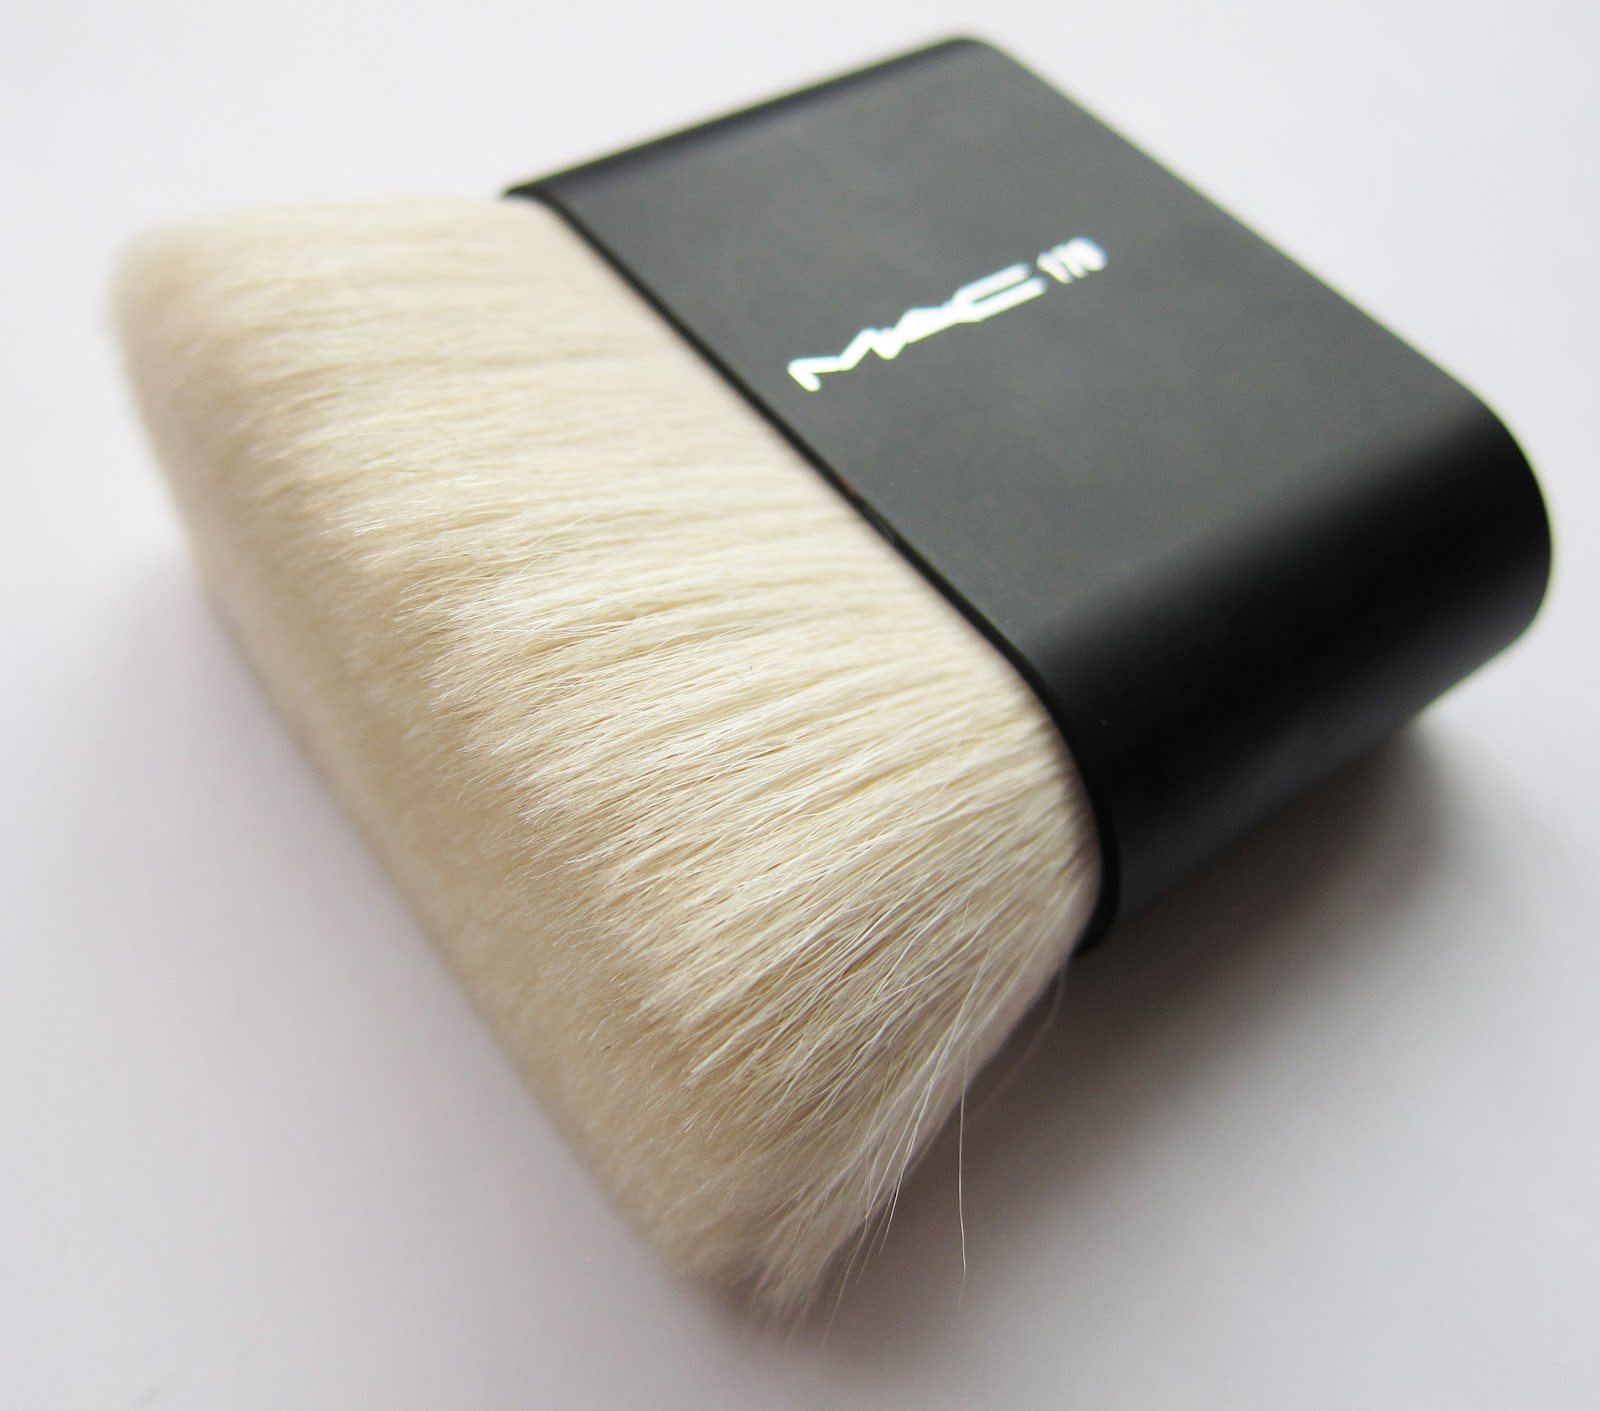
Brushes:  I was trying to photograph these all in one shot, but they wouldn't lie flat properly so I decided to show them individually.


Makeup
MAC Gold Pro Pigment ($12), MAC Bare Study Paint Pot ($12)
Bobbi Brown Corrector in Light Peach ($9), Bobbi Brown Creamy Concealer in Warm Beige ($9)
Clinique Naturally Glossy Mascara in Black ($12)
Clinique High Impact Mascara in Black ($12)
Lumecin Overnight Brightening Gluco-Protein Treatment ($18)


Hair
Bumble and Bumble Surf Spray ($10)
Bumble and Bumble Creme de Coco Masque ($20)
Note:  I also got the Creme de Coco shampoo (1L) and conditioner in four 2oz travel bottles. 
Here's the thing -- they were selling 8 oz bottles of conditioner for $18 and 2 oz bottles for $4 each.
Wasteful, but more economical for me ;-)


Brushes
I would have done this in one photo, but they wouldn't lay flat.  Naughty brushes.
I can't remember how much each brush cost, but they ranged from $10 - $20.  This giant buffer below was $30 though.  They also had some limited 187s that were $50, but I'd rather a normal-looking one if I have to pay the retail price anyway.
MAC 179


MAC 194

MAC 205

MAC 225

MAC 231

MAC 272

MAC 311

MAC 184

Design by | SweetElectric